propellers, props, prop, model engines, model airplanes, models, R/C,hobbies, hobby, Radio Control, composite prop, electric power, miniature models, 3D models, nelson engines, jett engines, model builder, blades, 2 bladed, 3 blades, 4 blade, Qpolecat, shotgun, Darrol Cady, e-flight, e flight, electric airplane model, park flyer, parkflyer, parkflier, 3d aerobatics, aerobatics, IMAC, foamy, foamies, brushless motor, GWS, JR, futaba, jeti, bluecor, foam, Depron, depronusa, ezone, wattage, foamfly, hover, torque roll, torqueroll, indoor, edf

Email Darrol

Darrol
1320 Concord Drive
Billings, MT 59101
USA
Ph: 360-903-3520
------ Super Accurate Digital -------
------ Racing Engine Measuring Tool -----

toolbox Stop Guessing!

This is the easiest method and accurate tool to be able to duplicate your engine setup. When you make a change, you will know that it will be the numbers that you want. There is no need for charts to read your engine settings. Click the link at the left below for detailed instructions on engine setup.


             Front 
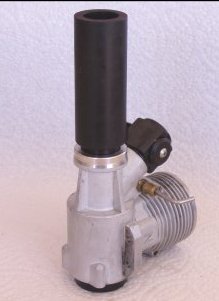
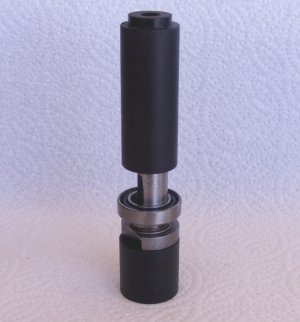
Bearing Installation
Bearing Tool
After removing the bearings, set the crank on the short piece and use the longer pieceto seat the rear bearing on the crank. Picture to right. Then, while the case is still warm from removing the bearings from the case, slip the crank with the new rear bearing installed in the case. Slip the short piece into the back of the case and line up the crank pin in the hole in the short piece.

Slip the front bearing on the shaft and use the other end of the long piece to push the front bearing in place. Tap the front bearing in with a soft mallet. Not hard, just enough to make sure that both bearings are completely seated in the case.Picture above. When you finish putting it together, you will have just a little end play in the crank."
Darrol

Bearing Tool
QKE-24

"DCRC Bearing Installation Tool"

I have been using this tool for the last 7 years. Everyone that has seen me use it wanted one like it. I finally found someone to make them for me. One of the neatest features of this assembly tool is that it assembles your motor on the part that it is going to be used with, not a substitute. It makes for perfect alignment.

The tool is quite simple, but very effective and efficient. First step is to remove the bearings from your engine. Place the case in the oven and set it for 275 degrees, for about 15 minutes. When it is up to temperature, remove the case from the oven and tap the backplate end of the case on a flat board. The rear bearing should drop out on the board. If it does not, use the removal tool to take it out. The front bearing can be tapped out with a dowel.

             Bearing to Crankshaft
Bearing tool2


Custom DCRC Pro-Drivers


DCRC Racing MARK II

Pro DriverMKII


DCRC Platinum Pro-Driver
Mark III

Pro Driver MKIII

clear

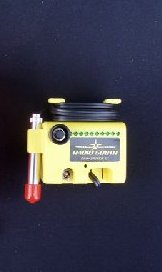
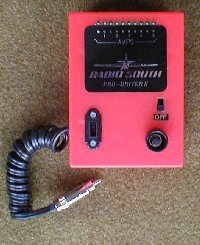
The DCRC Mark II is all new. It is still a higher output unit, but it also incorporates a new feature. The timed switch is has a 3 minute timer instead to the 60 seconds of a standard unit. It also has an on/off slide switch. The racing adaptor is sold separately.

What this switching system does for you as a racer is:

Lets you turn on your DCRC Pro-driver when you get to the line to make sure that your plug is good and that you have a good connection. Then you shut off the slide switch to save on your battery and glow plug. When the clock starts, turn on the slide switch. You are ready to start.

After the 3 minutes is up, the timed switch shuts down the unit so that you do not run the batteries down.

The DCRC Platinum Pro-Driver, pictured at the right. Is 1/3 the size and weight of the original "Orange Box" and has a 1100 NiMh power pack. It comes packed with the charger to properly charge the DCRC Platinum Pro-Driver. It can also be charged with your NiMh peak chargers.

The DCRC Platinum Pro-Driver is activated by a push button that turns it on for a one minute interval. Removing the possibility of leaving the unit on when not in use.

It is fitted with the Sonitronics standard glow plug clip. You can get them in longer lengths and just plug them in. We also have a "clip on" racing clip that will simply plug in the DCRC Platinum Pro-Driver for you."

Clip Racing clip for the Sonitronics connector 

These DCRC Pro-Drivers are not the same that you see advertised for the sport fliers or the pattern fliers. These units have the output turned up, so that they will properly light a Nelson Plug or a Glo-Bee for maximum performance. It will also work well for the premium glow plugs that are used in our racers for the 424 class. The DCRC Pro-Driver is becoming the glow-driver of choice for all racers. The unit is compact and reliable. It is easily charged with chargers that you already have.

The specially designed LED display replaces the traditional analog meter. It is much more tolerant to rough treatment. The high impact molded nylon case is designed to be nearly indestructible. The optional special plug attachment on these units is designed for our racers. It clamps to the cooling fins and attaches to the top of the plug. The standard glo-plug clip is also available.

You will no longer have to wonder about the condition of your glow plug before you take it out. You will soon learn how many of the LED lights will light on the good or a new glow plug that you are using. To check your glow plug before a heat, just attach the DCRC Pro-Driver and count the lights. If your normal amount of lights is on, your glow plug is still good. If the unit is showing no lights or too many, then there is also a problem. Pull the plug and check or replace it.

FAI DCRC FAI F3D Pro Driver
With 2400 Mah Nickel Metal Hydride Battery


This is a very special DCRC Pro-Driver. It was developed especially for the F3D International FAI Pylon event. The unit has a 3 minute timer for the on/off switch, a toggle switch and a potentiometer.
It has fully adjustable heat range. A must for the heavy duty Glo-Bee plugs from Andreas Kaiser. These heavy duty plugs take additional current to light them properly.

With this FAI Pro-Driver you can go to the line, connect your plug, push the timer button, verify the proper current draw by counting the LED lights, then turn the unit off with the toggle switch until it is time to start. You can leave DCRC Pro-Driver attached until the flag drops. The automatic timer will shut it off after the 3 minutes.

Fred Burgdorf told me "He would have eliminated most of his no starts at last years Euro Cup, if he would had one of these then."


Tach

TNC-01


FROMECO "TNC" tachometer

Processing: The new Fromeco TNC's "brain" has been totally revised, incorporating the latest microprocessor technology for 0.05% accuracy and improved functionality.

Durability: Fromeco has engineered the tachometer's packaging for damage resistance. The optical sensor element is protected and has an integrated battery compartment. Internal components are surface mount technology for further durability and reduced size..

ON/OFF control: Fromeco has eleminated the problem of accidently leaving the unit on by incorporating a pushbutton control that turns the tach off when released.

High RPM hold: The tach displays the current RPM and the highest RPM obtained. There are 5 significant digits for each measurement.

Upgrades components: With the latest engineering components the TNC's new optical sensor easily obtains RPM measurements at 6 feet under most lighting conditions. The RPM readings are then fed to surface mount IC technology for processing and filtering providing stable and accurate readings for 2 or 3 bladed propellers.

Model Aircraft Spray Guns

Paint Gun

Pictured is the latest models of the Iwata miniature spray gun line. Model number LPH-50 and W101. The LPH50 is an exceptional tool for painting our smaller items. It does not require a large compressor, as it only uses 1.8 cubic feet per minute to spray. Being an LPHV spray gun, it produces very little over spray. The paint that you spray goes on the surface that you are painting, not in the air.

Click here for
Painting Tips

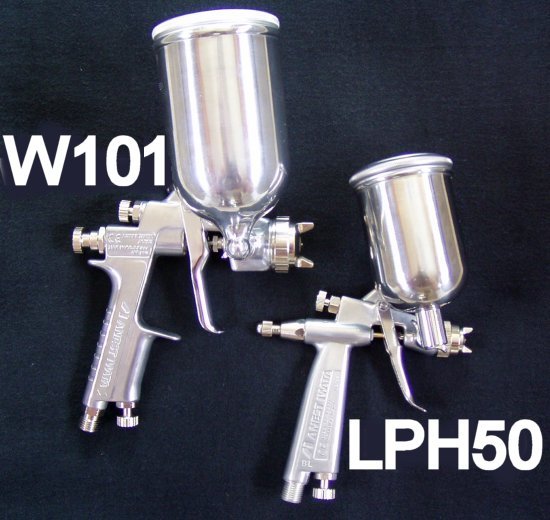
Iwata Miniature Spray Gun
****************************************Sold Out*******************************************

This miniature spray gun has almost a 4" spray fan. For the kind of painting that we do on our models, that is more than enough. It also has two air adjustments on the gun. One at the base of the body is to adjust total pressure and the other adjusts the fan size. The fan adjustment is a great feature. With this, you can go from a full fan to a round spray. The round spray is the same spray as you get with an airbrush. There is also a trigger limit that controls the amount of paint and air that passes through the spray head. With all the controls that this gun has, you can do many things with it.

You can put on a base coat, then cut the size of the fan down to paint stripes. If you want to do some fading, just turn the fan off and turn the paint flow down. No need to get out the airbrush. You already have it in one miniature spray gun, the Iwata LPH-50. This is a miniature gun that could have been designed for us as modelers. It fills the bill.

This spray gun is also gravity fed. As occasional users, this has some special benefits for us. For the small projects, we can mix ½ ounce of paint and the gravity cup will use it all. It makes it perfect for using small batches of paint for the small jobs. The can holds 4 ounces and can be filled for the larger projects.

Cleaning. I do not disassemble my guns to clean them. I pour lacquer thinner in the cup to first clean the cup and the outside of the body. Then I flush and back flush the nozzle and chamber with fresh lacquer thinner. Putting your finger over the spray nozzle, while you are spraying the lacquer thinner does back flushing. I repeat the process until the lacquer thinner no longer picks up any of the color just painted. That is it… Then, I pour a couple of ounces of thinner into the cup and hang it up. It is ready for the next painting project. This may not be the recommended way of treating your spray gun, but it works. I have been using my other Iwata spray guns for about 5 years, and have had no problems with this system. They all work like they did the day that I bought them.

The retail price of the Iwata LPH-50 is: $495.00.
Our price on this fine miniature spray gun is $255.00!

W101 Spray Gun
****************************************Sold Out*******************************************

The W101 is a detail gun. It is a small high quality spray gun, but is larger than the LPH-50. I personally have both and use them for the different purposes. The LPH-50 is fantastic for trim and smaller items, but it will also paint larger items with more time and paint. The W101 is great for larger pieces or planes, but can be turned down so that it will do a good job on smaller parts and trim colors. As a base coat gun or a clear coat gun, it cannot be beat. The W101 has a larger fan and will lay the paint on quickly and more evenly with less paint.

The ideal is to have both guns. But if you only have one, choose the one that will meet most of your needs. Either will do both jobs, but each will do better on the projects that they are sized for.

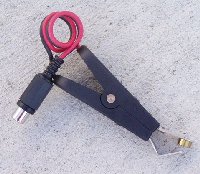
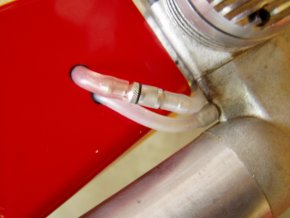
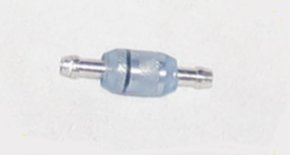
Small Fuel Filter

All classes of racers should be filtering their fuel at the source of fuel and in the airplane. The problems that occur from not filtering affect all classes of racers. Sport 40, 424, 428, to FAI all will benefit from using the micro filters.

Spray bar clogging can be real pain in the butt. The smallest amount of dirt can create problems. You can get the crud from not keeping you SuperTanker clean, or from others contaminating the fuel at contests. Even if you filter your fuel and keep your equipment clean, others may or do not.

Small Filter

Be more consistent. Install a micro fuel filter in all of your racers.

The filter is 1/4" in diameter and 7/8" long.


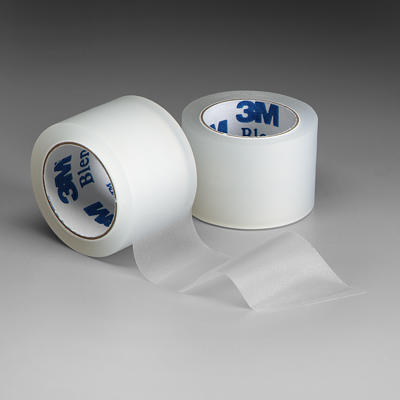
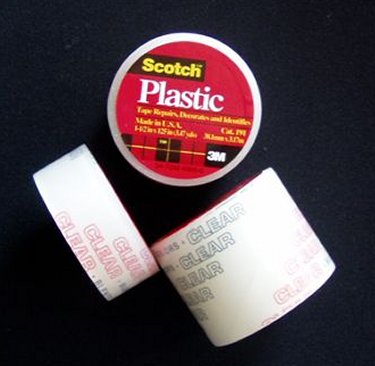
I have been using the micro filters for many years. They are important for consistency in your racing program. Tiny little things in your fuel system can mess up your whole weekend... Remember how small the space around your spray bar is. It does not take much of a spec to give you a lean run and ruin a good engine. Or you go to the line and you have to open your needle from the last run because you can tell it is too lean. You open the needle and run back. As soon as you get in the air, the clog works its’ way through and you are blubbering rich for the other 8 laps.

The filter must be on the needle side of your fuel system. You must also fill the tank before the filter. My installation is easy. I fuel from the outside of my airplanes and need a fuel line joiner anyway. I use the filter as the joiner. See the photos.

I prepare my filters by a liberal coating of Lock-Tite on the threads and then tighten them. I used to put a piece of large fuel line over the outside, but have found that a good coating of the thread locker does the job just fine. Once in awhile, I remove the filter and back flush it just to get the crud out of it
.filter


clear clear clear clear clear clear clear clear

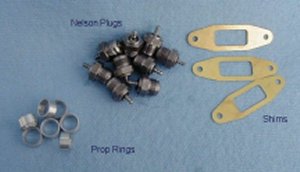
Racing Engine Prop Rings

These prop inserts are a must for all APC Quickie and Q40 Carbon racing props. When you use these inserts, your racing propellers will be in balance. No need to even check them. The crank holes in composite props are drilled rather than being molded. The drilled holes are drilled from a guide hole, but as hard as they try, the drilled holes are not perfect. The molded recess in the back of the props are perfectly. This is even more important when you have to ream or drill your props to fit your crankshaft size. These inserts fit the mold recess on the back side of the props, so the drilled or reamed holes do not matter. There are two different sizes, so do not get them mixed up. These are for the 5/16" cranks only.

The inserts for the Quickie will stay with the crankshaft when the prop is removed and the Q40 insert will stay in the prop. Both are reusable

You will be pleased with the smooth running of the engines with the Alignment Ring, and not taking the time to balance the APC propellers.

Rings
QKE-03 ring for Q500
QKE-04 ring for Q40
QKE-10 Nelson Plug Heavy Duty
QKE-15 Nelson/Jett Muffler Gasket


Back Plate Mount

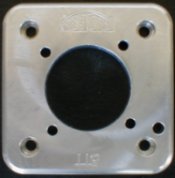
40 Motor Conforming mount 2.25"
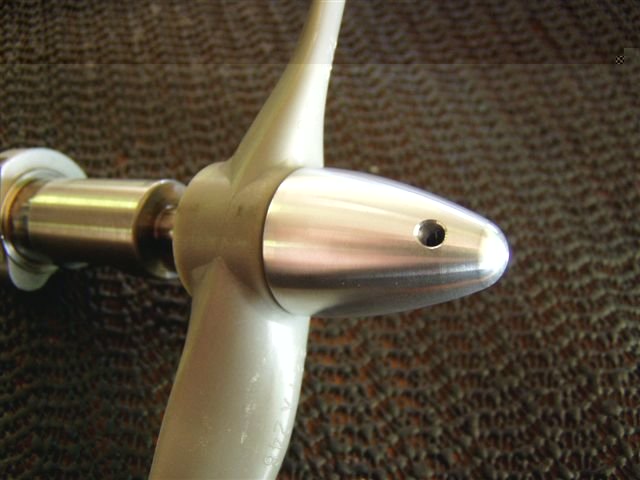
Mount

Fits All 40 size engines:
Thunder Tiger, OS, Evolution 46, Webra, Nelson, Jett, Magnum etc.

QKE-17 Mount

Also see Jett Mounts
click here

Spinner Nuts

Spinner

Also see Jett Q40 spinners, click here


These spinner nuts for Quickie or Sport are the right shape for your starter to grip properly. Notice that they are contoured to fit APC propellers. We have them in two different thread sizes that fit most of the most popular engines. Part QKE-11 will fit Nelson engines or any engine with a 5/16"-24 crank size. Part QKE-12 will fit most of the popular .25 to .46 engines that are being used, with a crank size 1/4" x 28."
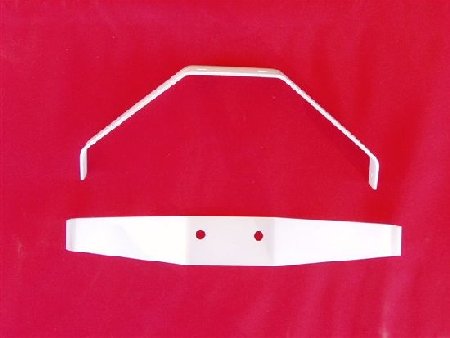
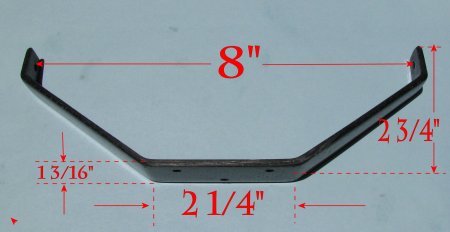
Gear

Are your Quickie landing gears spreading and require straightening after every than perfect landing? These are your answer without spending your lunch money.

These Quickie landing gear are tempered after they are made. You will find that they are light and very strong. They do not bend and hold like most aluminum landing gear. They are the right size for almost all legal Quickie airframes.

The measurements are 2.75" high, 7.625"wide, and have a 2.25" x 1.25" mounting plate."

QKE-30

Carbon Fiber Q500 Landing Gear
click image for additional view

Gear

These are the ultimate in Q500 landing gears. They are made in a mold and come either with pre-drilled holes or with out holes. They do not bend and flex on landing to return to the original shape. They are the right size for almost all legal Quickie airframes.

The measurements are 2.75" high, 8" wide, and have a 2.25" x 1.1875" mounting plate."

QKE-31

Looking for tight straight running wheels? Here is the answer!

Ball Bearing Wheels

BBW-01 blk Standard aero shape ball bearing wheel

BBW-05 blk Flat one side ball bearing wheel

These wheels include axels, screws, wrenches ans instructions for mounting on flat stock landing gears.

Ball Bearing Wheels

Streamline Racing Wheels
and Axels

Streamline Wheels and axels


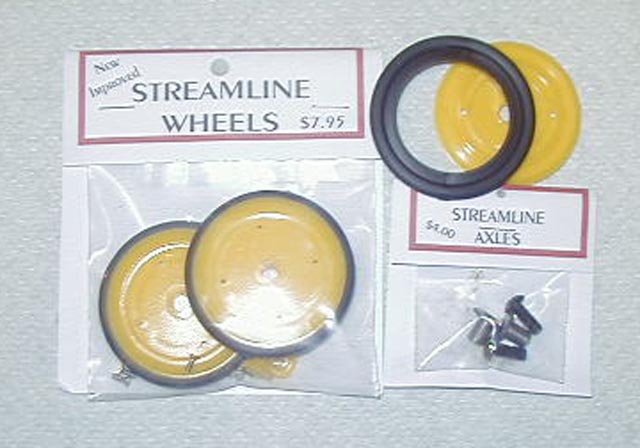
Top of the line racing wheels by Streamline

SLW-01
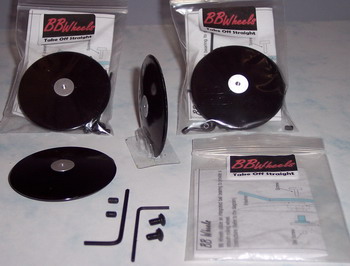


SLW-03  Pizza Cutter Wheels              $10.00 pair
SLW-02  Axel set for Cutter Wheels   $3.50 pair

 
We also Carry Tape
Blenderm for Electric Hinges
3M Racing Tape
Blenderm Tape
3M Tape
Are you tired of the tape coming loose on your electric flying surfaces? This is the only tape that really works on all of the foam airplanes for hinging. It is thin, flexible and has a very aggressive adhesive. It stays where you put it. Use it on all electric airplanes that use the tape to hinge the flying surfaces with tape. Have a roll in your tool box and you can use it as intended to patch up cut fingers!

QKE-07 1.0" width
We carry the 3-M tape used in racing to cover hold downs, wing screws, hatches etc.The pictures above show various sizes, but we only carry the most commonly used width of 3/4".

QKE01 3/4" width
   

Bob Smith cyanoacrylates

Rubberized
IC-2000™ CA
Medium 1/2 Oz
CPR-70
IC2000
Rubber-toughened cyanoacrylate that forms superior shock resistant bonds on non-porous surfaces. The black colored CA has added flexibility for the bonding of metals, fiberglass, rubber, carbon-fiber and other advanced materials. For model use, IC-2000™ is ideal for the bonding of bulkheads, formers and servo rails to the inside of fiberglass hulls and fuselages. Setup time is 20-40 seconds, which can be accelerated with INSTA-SET™. When cured, IC-2000™ is pliable enough to be carved with a hobby knife.

INSTA-CURE™ 1 Oz.
Insta-Cure
Water-thin viscosity that wicks deep into joints by capillary action and cures in a matter of a few seconds. Surfaces to be bonded must be tight fitting and should be held together while you apply the CA around the edges of the seam. At the moment CAs cure, they give off a vapor that can irritate the nose and eyes, so be prepared. Thin CAs work very well on balsa since they penetrate into the wood and form more than just a surface bond.
CPR-73 .

Foam Safe Oderless
SUPER-GOLD™
Medium 1/2 Oz

ELE-74
Glue


This foam safe oderless
CA for assembling foamy airplanes.


For another IC-2000
Application click here.


You will change your glueing habits. Anywhere you are using Ca now, that the black color does not show, you will probably start using IC-2000™ for its' extra strength. It is great for plywood, hardwood, metal, rubber, or almost anything you want to fasten permanently.

clear

Foam Safe Oderless
SUPER-GOLD+™
Thin 1/2 Oz
ELE-72

Glue

This foam safe oderless
CA for assembling foamy airplanes.

Insta-set

BSI Inst-Set CA
Accelerator 2 oz

Ca Activator Foam Safe (Kicker)
CPR-75

These are 10 ounce cans of a great kicker. You will use it to the bottom of the can, and that will take you a long time. The nozzle does not plug and will spray evenly for the entire can, not turn into a stream. It will not evaporate while is sitting on your workbench.

I have not found any foam that it will bother. It also works on all Ca's. It does not make it turn to "popcorn"; it just makes it cure very quickly.

Price: $15.00


Item

Size

Description

Price

SPD-03

FAI F3D , Orange

DCRC FAI Pro-Driver MK II 2400mAh

130.00

SPD-06 Standard, Yellow DCRC Platinum Pro-Driver 95.00
SPD-11 Racing Glo-Clip Platinum Glo-Clip 15.00
TNC-01 TNC Tach All New FROMECO Tachcrometer 135.00
       

CPR-70

IC-2000™

BSI IC-2000™ CA 1/2 Ounce Medium

7.50

CPR-72

BSI Insta-Set

BSI Insta-Set CA Accelerator 2oz

5.00

CPR-73

BSI Insta-Cure™
1 oz

BSI Insta-Cure™ Thin CA 1 oz

5.00

ELE-72

SUPER-GOLD+™

BSI Foamsafe CA 1/2 Ounce
Thin

6.75

ELE-74

SUPER-GOLD™

BSI Foamsafe CA 1/2 Ounce Medium

6.75

CPR-75

10 oz Spray Can

CA Activator Foam Safe

15.00


QKE-01

3/4"

Racing tape

2.25 each

QKE-03

Quickie 500

Insert ring

1.50 each

QKE-04

Quarter 40

Insert ring

1.50 each

QKE-10

Nelson Plug

Heavy Duty

6.00 each

QKE-07

1"

Blenderm hinging tape

2.50 each

QKE-11

Nelson Spinner

Spinner Nut 5/16"x24 crank shaft

10.00 each

QKE-12

Standard Spinner

Spinner Nut 1/4"x28 crank shaft

10.00 each

QKE-14

Fuel Filter

Small Fuel Filter 1/4" dia.

5.00 each

QKE-15

Muffler Gaskets

Nelson/Jett/Edmunds

3.50 each

QKE-17

Conforming Mount 2.25"

One Size Fits Almost All

18.00 each

QKE-24 Bearing Tool N DCRC Custom Bearing Tool Nelson 35.00 each
QKE-24 A Bearing Tool J DCRC Custom Bearing Tool Jett 35.00 each

QKE-25

Digital Measuring Tool

Deck and Head Spacing

85.00 each

QKE-29

Landing Gear-Al

Q500 Landing Gear AL, 1/4" rake

13.00 each

QKE-30

Landing Gear-Al

Q500 Landing Gear AL, Standard

13.00 each

QKE-31

Landing Gear-CF

Q500 Landing Gear Carbon Fiber
with pre-drilled holes

29.00 each

QKE-32

Landing Gear-CF

Q500 Landing Gear Carbon Fiber
no pre-drilled holes

29.00 each


BW-03

Wheels

Non Ball Bearing Aero Shape

20.00 pair

BBW-01

Wheels BB

Ball Bearing Standard Aero Shape

30.00 pair

BBW-05

Wheels BB

Ball Bearing Flat on one side

30.00 pair

SLW-01

Wheels

Streamline wheels with T-ring

8.00 pair

SLW-02

Axel

Axel set for wheels above

3.50 pair

Onlineorder
clear Order Accessoriesclear


clear

Darrol Cady
Ph: 360-903-3520

© Copyright 2007-2008 Darrol Cady All rights reserved.